My Blinkie


Popular Posts
-
 I have a new kit for you. It has two shades of red to cover most of those vamp tubes out there. You can pick this awesome kit up at AmyMa...
 -
 NEW PTU Gold Tones Christmas. Huge kit. 158 elements and 20 papers. All Tagger kits and clusters only 74 cents. Sale is ending soon. 8...
 -
 PTU Bloom here . HappyPsp_ing Also make sure to check out ALL clusters made using this kit from all designers. ♥
 -
 EVERYONE KEEPS ASKING ME ABOUT THIS ONE...SO I JUST LOADED TEMPLATE HERE AS WELL. THANK YOU GUYS FOR ALL THE COMMENTS , HERE ,GROUP AND FACE...


Saturday, April 30, 2011
PTU-MayFlowers

Hi guys!!
This morning I have used a PTU kit called "MayFlowers" by DC Creations and
you can get it at Lollipops 'N Gumdrops HERE
I have to say Chris.. This kit was a challenge for me!
FUN..but I havent worked with this type before
Mask19 by HorsePlayPastures HERE
Open your canvas 650x650 transparent
open your cookie girl
and on her dress pick a color
I picked the green
close off your background and fill properties
the green color should be in your foreground and stroke properties.
select your preset shape tools
the square settings -30.00 width(everything else I left
as is..)
draw out a med size square
copy and close it off
standing back on the orginal
go to effects-3d-inner belevel-

close it off
open up the copy and
change the color to it with the pink in the cookie
do the same settings as the green frame
now we should have two frames.
rotate one way and the other one the other way.
click inside frame and expand by 6
add new raster floodfill with color
do the other side the same
I used a gradient from colors of the frames
Open the cookie
resize it about 80%
copy and paste into frame on left
place it similar to mine--paper.select all-float-invert-stand on cookie-delete
paste in cookie again-flip-repeat steps
both cookies..-blend mode-softlight
it should now look similar to mine.
Open up the element -MayFlowers Bow1
resize add shadow
Add tube-resize 60-70%
place in the middle of frames
open elements-plant2-resized
place them all around
some in front of frames=2in back of frames
open elements-mayflower2 & 3
place them all around-resizing
element-bird & birdhouse 2
butterfly 2 & 3
now merge all together.close off
add new raster
flood fill with a gradient,colors same as frames
layers-load mask-find ms bevs mask 19
add it
open taggie part
add noise to the mask
merge all
add name and credits!
thank you for letting me play with your kit Chris!!
I love new things,challenges and now I will not be afraid of kits like this one again!!
I love new things,challenges and now I will not be afraid of kits like this one again!!
xoxoxo
PTU_EmoLoveSiggySet


PTU kit called EmoLove by PinkGirlDesigns and you can
get it here at SWA
Tube by Misiticheskaya and you can get it here at PFD
Plugin EyeCandy4000 glow
open canvas 650x275
and paste in paper 7
now open your tube
the one I used was super in size so I shrunk down a lil bit and
then placed in over on left hand side.(see how its bigger there)
then I resized a lil more and placed in over on right hand side
resized one more time.so it was a lil smaller then the main
focus tube I would place in later
now merge the two together.
opacity-60%..close off
open up element-puppy.
size down and paste in twice
size down,one of left and one on right
check your size one last time.
blend mode.soft light.
open your tube.make sure your
tube is ABOVE the puppy.
your siggy should now have the tube ,merged
and the puppy ,merged and you should
see hints of the sad puppy through the girl
open elements-sparkle hearts
copy ,paste twice.
place similar to mine
add a slight shadow. not enough to show, but make it stand out just the tinest bit
1-1-80-1 is what I used.
merge all
then go to effects-image effects-page curl-40%-20%-35%
pick your colors according to your tube
#8c4472
now do it for the top left hand side ok
and then same thing bottom right hand side..hit ok
now you should have your lil page curls.
flatten.
select all,float,modify,contract=5
invert,delete
add new raster..floodfill with color of choice
add noise 80%
add name and credits
now for your tar.
200x200
I dragged in my finished sig set.placed what part I wanted to show in my Tar
and merged down
do your page curl
image,canvas side.
enter in 210x210
ok
add new raster
flood fill in with color of choice
add noise
add credits and letter
on the texts. I used gradient glow
hope you had fun!!
xoxoxo
Thursday, April 28, 2011
PTU-RockStar

Hey everyone!
Today I used PTU kit by AngelDesignz
and you can get it here at SCRAPS WITH ATTITUDE
Tube by OrkusArt at PFD.
Template34 by Kristen here
filter TowTheLine
eyecandy 4000 glow
open template and expand canvas to 650x650
open element AD frame 1
add shadow 1-1-80-0
stand on the circle in the template
selectall,float,invert and paste in paper 5-delete
standing on paper 5-select all,float,expand5
add new raster..floodfill with color of choice
add noise 80%
standing on rectangles.
selectall,float,invert,add paper6,delete
standing on paper 6
select all,float-add new raster
flood fill,one color black,one red
add noise 80%
select none
Standing on paper 6-use filter TowTheLine.default settings
open elements
ad charm
ad guitar
ad music notes
ad sihlouette
ad splatter
ad star and gear
ad speakers
word art
the music notes I copied and paste both up at top of template
the speakers 3x's
see mine
add guitar
now add the sihlouette opacity 60%
add TUBE
and then place word art
adding the pick charm to the word art
the word art -select all,float,expand-add new raster-floodfill black.addnoise 80%
also used eyecandy 4000 glow on it.white thin settings
add in the spaltter 2x's
and the stars and gears
add a shdow on your tube
-1 -1 ,80,5
add your name and credits
Hope you had fun!!
xoxoxo
PTU-GlitterNSkulls forum set


PTU kit GlitterNSkulls by PinkCandyDesigns and you can get it
at Lollipops 'N Gumdrops HERE
and the awesome tube by Ms Wendy Gerber at PTE and you
can get it HERE
open a canvas of 650x275
and paste in paper 5
add new raster, pick color from tube
floodfill.blend mode,overlay
add your tube off to the left
set it just where you want it.flip
close it off
paste in tube again. right handside
of siggy..copy and paste again. set them where you want them
blend mode.screen.opacity 50
open up main tube.add shadow
open up element
chain,charm &charm2 and sparkles
start by pasting the chain up at the top on right edge
and then paste charm(skull) copy
and paste on the other side
paste the cross in the middle.
flatten
add border
2black
4purple
2black
magic wand-click inside purple
add noise=50
now add credits and name
hope you had fun!!
Tar is same was..canvas is 200x200
xoxox
Tuesday, April 26, 2011
PTU_Teenage Rebel

Tonight I am using PTU kit by Kristin of Toxic Desirez
and you can get it here at Scraps With Attitude HERE
Tube by CelinartPinup and you can get her tubes at SATC here
Template 128 by HorsePlayPastures and you can Bev's
awesome template HERE
Penta is the fliter used
Now since I used alot of elements
from this kit. Size as you want and shadow
as you want!
Open the template and delete credits
standing on the rectangle in back,click on the inner one
select all,float,invert and past in paper 6 delete
bottom rectangle.pick color from tube
select all,float,floodfill with color you picked out
add noise=50
stand on the dotted lines
select all,float,expand by2
add new raster and floodfill
with color of choice.
I picked out two colors and used them.
see tag
select none
add noise -50%
the two smaller rectangles
merge them together
select all,float ,invert
one side-add paper-2 and other side 3
hit delete on 2 then 3
add penta -jeans-15
standing on the bigger ones -(under the smaller ones)
merge them togther.
select all,float,add new raster,flood fill with
the two colors you used on dotted lines
select none add noise=50%
standing on the middle rectangle
select all,float,add new raster,flood fill with the same two colors
BUT this time ,invert the colors.
add new raster,flood
add noise=50%
paste in tubes
on left and copy ,mirror
merge them together
blend mode,softlight,copy
Now paste your main tube
and dont forget to add a shadow to her
the elements I used
(PUT THEM WHERE YOU WANT OR SIMILAR TO MINE)
ELEMENTS USED:
backpack
beaded string
bottle
charm
condom
diamond skull
flames(here I place them in the middle rectangle
copied,flipped,merged together,blend mode,softlight,copied)
hair ties
journal
nailpolish
pencils
pill
plush
razor
ring
soda can
word art2
sprakles
here i copied and paste 2x's
I hope you enjoyed
and Ill see you guys on the next one!!
xoxoxo
PTU-EmoGreen

Today Im using a PTU kit called "EmoGreen" by Le paradis du scrap
and you can get it here at Lollipops 'N Gumdrops
The tube I used is by SkyScraps and you can get it at SATC
Template used was 7 in the rac2 set by JennyDesignz
and you can get them here
Now lets get started
Open template and delete the credits and all
the texts. delete rasters 1&6
Stand on copy 5 and merge together to raster5
still standing on raster5
selection-select all-float-
add new raster layer
flood fill (i picked from tube
and it matched my papers)
select none
still standing on the now green
raster5
select all-float-modify-expand3
select selection borders 3
add new raster
floodfill black
place under the green
Raster2
Use your color changer to change the color
I used the same colors
now open elements
Squelette1
Etoiles1
Croix corde2
The "etoiles1" elements
Copy-mirror-merge -copy-flip
they should be criss crossed-similar to mine
and you can now paste your other elements similar to mine
open your tube now.
fix it the way you want-copy-mirror.(merge them)
standing on the rectangle(mine is green)
select all-float-invert-
stand on your tube-delete- now blend-overlay-copy
now paste tube again ,now in the middle.
copy-mirror(fix it)
standing on rectangle again
select all,float,invert
stand on tube-delete
blend mode-luminace
be sure to add dropshadow
credits and your name
hope you had fun!!
xoxox
FTU Music Princess

Saturday, April 23, 2011
PTU-Punk Princess

Afternoon guys!
Today I am using the awesome work of Missy from ScrapsWithAttitude
and you can get her PTU kit "Punk Princess" HERE
The awesome tube by verymany
at PFD.
Template2 By CupCakeSprinkles HERE
Mask WSL149 HERE
Plugin PentaJeans
Now lets start by deleting the heart and credits
and then to expand canvas size to 650x650
and we do this by standing on bottom blank raster layer
go to image.canvas size
ok
stand on rectangles
go to selections.select all.float.expand by 5
add new raster move under rectangles
floodfill with color of choice.add noise
still standing on rectangles.drag in paper 15 resize 70
invert.delete
add shadow
stand on white squares.select all.float.
floodfill with same color as last on a new raster
add noise
Open up the Tshirts
Punk and Princess
resize them both
now standing on the black sqaure
hit selections,select all,float,invert
add 1st Tshirt.
using tool rotate a lil bit
hit delete
do the same for other sqaure.
use mine as a example.
add shadow.
elements
dangle star 1 & 2
resize 40% twice
star bow
resize 40% twice
add shadow to both
star two mirror and move down to where I moved mine
stitched heart 1
copy and paste twice
similar to mine.
add shadow
I used the filter penta jeans on tshirts
as a last thought
add tube
now open up paper 7
and add mask
add credits,name
Hope you had fun and Ill see you next time!!
xoxoxo
Thursday, April 21, 2011
PTU-Punk1

Hi guys!
Tonight I have used Toxic Desirez's Punk1 kit
Kristins site HERE and you can get scrapkit
at Scraps With Attitude HERE
I used tube from PFD by rzhevskii
and template 84 by Addictive Templates HERE
So I dont have to repeat myself over and over.
Drop shadow of choice
font of choice. I used Riddle(free)
DELETE rasters 1,13,10,9, & 6
Ok we are gonna work from the bottom of template up.
so standing on the bottom raster(3)
select all,float,invert ,drap in paper 24.delete key
delete raster3.now standing on the paper 24 layer
select all,float,defloat,expand by 5
add new rayster(picked color from paper)
floodflill into new raster
selection none
add noise(60%)
drop shadow.
repeat these steps for rasters
2&7
use my tag as a example for the papers
raster5 and copy of5 in template
merge down.
select all,float.invert and drag in paper3 hit delete
same steps for rasters 8,11 & 12
use the papers you pick or the ones I picked out.
add shadow!
raster14 copy and flip
Time for the elements now.
so many to pick from.
You can use mine as a example.
elements used were
BeadedString One
Bunny
Pill,Piercing,Razor Blade,Shoe
Skull 3
Skull scatter
Skullafly
sparkles
add credits and name!
Hope you had fun and Ill see you next time!!
xoxo
PTU RockOut

Today Im using PTU kit "RockOut" by Conchi@Dnscraps
and you can get it at Lollipops 'N Gumdrops HERE
Thank you for letting me play with your kit!
Mask WSL149 and you can get it HERE
Eyecandy4000 glow HERE
Open up canvas of 650x650 and floodfill white
open up elements
PSPGirl5 resize your choice
rockout microphone one
rockout guitar3
rockout music
rockoutbattery(drums)
rockoutondisk
rockoutskull
rockoutwordart3
rockoutbradstars one and two
You guys resize as you want and add drop shadow of choice.
now open paper 12 and add mask
Layers/load/save mask -load mask from disk
choose your mask. I picked 149WSL
fit canvas checked
ok
go on and close this off, we will resize it when done.
open up the rockout disk and resize
add shadow
now get your drums(rockoutbatter)
and resize them..you pick
I did mine at 90%
and place in the middle of disk
then take the rockoutmusic elements(I call them the two tall speakers)
and paste it onto your canvas. Copy. Close one
The 1st one put on the left side of your disk and erase one side
now open the copy,move to right side of disk and erase one side like you just done
on other side. add shadow.
resize your quitar place it and add shadow.
same for headphones and microphone.
I placed my microphone on top of the speaker.
now get your word art "rock out"
resize and copy.
place them similar to mine on the drums
and now your skull.
add slight shadow.
and now your pspgirl.
I sized her down a good bit.
Check your work and make sure you have enough
room on your disk to put your name in there
like a backdrop you would see at a concert.
the bands name type of deal.
if you have a big name like mine
you may want to shorten it or move things around a bit.
maybe pick out your font now and try it out.
once you know you can get your name in there.
add your bradstars one and two
I sized them down 90%
added a shadow
and then did the same for the 2nd one
I merged the blue and oragne brads together.
copied and moved ,paste. I repeated this several times.
now open up your mask and
resize it to fit your main elemensts ,similar to mine.
add a lil noise and merge all together.
Select all,float....crop to selection.
resize 10%
add your
credits
now add your name.
and give it a lil noise
then convert to rayster
effects,eyecandy 4000,glow
pick color
ok.
I used the thin settings
And thats it.
Hope you have fun and Ill see you next time!!
xoxo
Wednesday, April 20, 2011
PTU -Perfect


Today we are using a scrap kit PTU called Perfect by Tammys Scraps.
And you can get her awesome kit at Scraps With Attitude HERE
Template Collab by Rosey andSabine and you can get it HERE
and the awesome awsome work of Lady Mishka and you can get her tubes
HERE. You will need a close up!
MurasCopies (link I got it from no longer works) try google
Open the template and delete credits and texts.
Standing on the mask layer, go to selections,select all,float,invert and paste in
paper 2 ,delete.Do same thing for the circles and paste in paper1
open a canvas of 800x800,using a small text type in words PERFECT.
Open Mura's Copies and tiling. gap 3. Everything else I left at
default settings.
standing on the black circles and select all,float ,invert ,drag in PERFECT Text and hit delete
give bottom circles a shadow.(delete the neon green ones)
Standing on the big square now.select all,float,invert and paste in paper
8..delete.add shadow
white circle.add noise 50%-add shadow
pink circle,select all,float,invert and paste in paper 2
delete
and now the blue rectangle. you know what to do..select all,float,invert paste in paper 3 and delete
delete the stars in template also.
I always delete the layers in the template that I float and paste something into.
open LadyM's close up tube. Copy.
Standing on tube 1 .Blur-GaussianBlur 3.00.Blend,soft
Copy softlight
add a drop shadow of 10-10-50-5
ELEMENTS,resize as needed and add shadow!
I used elements
26,33,80,88,92,100 &115
Element26.copied and dragged down to just under the big circle
Elements33 copied (2) and placed them similar to mine
Then place element 100 & 92
115
Element 88 copy,mirror
and then on top of that paste in element 80
and last add your tube.
Your done
add credits and name!
Hope you had fun and Ill see ya next time!
xoxoxox
Tuesday, April 19, 2011
Easter Egg Bunny

Hey guys!!
Lets get started with out easter egg bunny.
You will need PTU kit "Cute Bunny" by PinkCandyDesigns
and you can get the kit at Lollipops 'N Gumdrops .
And I made a template to use for this and you can get it HERE
You dont have to use my template , you can make your own
using your eclipse shape and adjusting it a bit.
Open template and delete text.
Expand Canvas
We will crop it later but for now we need it bigger to add the elements.
I have already add the giltter and shadow to the template.
Its the one thing I didnt mean to leave like that but I forgot.
you are more then welcome to change the colors.
But for this tut, Im going to assume you are using it as is.
Now open up your ele06 and paste it onto canvas
drag down below the first frame
layer to the egg ,copy and drag back over it.
close of copy.
Standing on pink layer to template.select all,float,invert and hit delete.
now open up copy of bunny and erase any part of the bunny hanging over
at the bottom of the egg. Leave the ears alone. Use mine as a example.
Give a shadow to the bunny.
and now do the same thing for element ele21.
Copy twice.adjust them how you want them. Your pink layer should still be selected and
inverted. Now delete the parts of ele21 hanging out same way as we did bunny.
Give a shadow.
Open up element9
and place it similar to mine.add shadow.
now time for the pinkbasket and greenbow.
resize and add shadow.
choose 4 eggs and place 3 in basket and one next to basket.
the 3 eggs in basket. merge down so you have them all on one layer.
People do this part diff ways. Since its just a small area. I zoomed in on mine.
and erased the eggs right at the basket line.
added a shadow on another layer and then erased the part of it I needed to.
then pasted the green bow on basket.
now open element50 and paste it behinde the bunny. I copied my twice.
and erased any part sticking out of the egg.
open element 08
and paste behind the egg template. arrange it how you want.
I copied and pasted mine 3 diff times.
and now add element 24.resize and add showdow.
I typed Happy Easter..picked colors from the easter egg in
the bunnys hand. and when I did my names, I just flipped the colors.
merge all together. give a very light shadow to all and then hit select all,float.edit ,crop to selection.
Hope you enjoyed the tut! See you next time!!
xooxo
Monday, April 18, 2011
PTU -CottonCandy Hottie

Tube by SkyScrapsDesigns HERE
close up needed
PTU kit by Belle of the Ball and
you can get it at Scraps With Attitude HERE
I used mask WSL-220 and you can get it HERE
Canvas 700x700
floodflill white
paper 6 and mask WSL220
duplicate
add shadow 2.2.50.0
CC heartspill resize and add shadow 2.2.50.7
CC doddle2 -place it similar to mine.
copy,mirror.flip
add shadow
CC frame resize
Take your free hand selection tool and draw
around the 1st square.
invert and place in paper 18 resized down to 40%
and hit delete
do this again for next sqaure using paper 19
and then 3rd using paper 21 and one more time
using paper 24.
merge all the papers down to one. And dont forget to add shadow
to your frame.
now take your close up tube and paste it 4 times into the frame
similar to mine. erase any part of the tube sticking out of it's
frame. and then merge them down to one.
blend mode and overlay.drop shadow on tubes
now add your tube.dropshadow on her
paste two of the cotton candy elements,resize add dropshadow 1.1.80.7
All 4 of the gumball elements , I resized them 90% added a dropshadow and
just paste them onto canvas where they looked best.
Now add the CottonCandy text provide in kit.
add your credits and name
Hope you guys liked the tut! Ill see you next time!!
xoxoxo
CottonCandySiggySet


PTU CottonCandy kit by Belle of The Ball HERE
You can get the kit at ScrapsWithAttitude HERE
I used a awesome and HOT tube by SkyScrapsDesign that you can
get here at SATC
Now lets get started.
675x300 canvas
(note: I dont normal use 300.but when I want to add cute elements and not
just filters and animations, I will use 300. Thats not the normal sig size)
paste in paper 24. resize by 10%.Make sure you have all
colors showing.Move around if need to.
CottonCandyCurtian2 resize and place similar to mine(add drop shadow)
Your tube should be a close up and if possible looking two different directions.
Paste your close up 1st. Place it off to the left hand side.
shadow on DIFFERENT layer -3.3.80.5
now move the shadow off a lil and lower opacity to 60%
Now take the tube look at you and
paste onto canvas.
drap tube layer below the curtian layer.
blend,soft,copy tube
drap copied layer just above CottonCandyCurtian layer
blend mode,soft,opacity 60%
add a shadow on tube.
flatten image.
select all,float,modify.contract by 8.invert .delete
new rayster layer
floodfill with a color you pick from the
cottoncandycurtian2 element
I added a light purple
add noise 60
add credits and name
Avatar
200x300
take the merged layers from siggy
and pull it over into the blank canvas here
postion it similar to mine.
flatten image
select all,float,modify,contract by 3,invert ,delete
new rayster layer
floodfill with same color as siggy
add noise 60
add credits.
Hope you guys have fun !!
xooxox
Sunday, April 17, 2011
My Hannah Siggy
Kit I used was the collab kit from ScrapsWithAttitude
BreathOfFreshness.
This kit is too cute and fun!

SunnySig

This kit is part of a collab at Scraps With Attitude that
you can get HERE
So much that you can do with this kit.
I have used, Kristin's of Toxic Desirez part.
Font I used was black rose HERE
Open a blank canvas of 650 x300
elements that you will need are
BOF grass
BOF bunny
BOF flowers
BOF cloud
BOF rainbow
BOF ladybug
BOF wrap
Resize all to fit into your canvas as needed
Lets start with the grass, place it similar to mine.
now pick out a color blue.(#92cafa)
place your rainbow and clouds.
rainbow paste X's 2
and then the cloud, copy move over a lil
Pink bunny and then the butterfly.
You can place these were you want or similar to mine.
The now grass ,copy and paste onto canvas
move down so you only have tips ob canvas
make it look like the bunny is sitting in the grass.
now start placing your flowers.
stick them all around kinda and use different sizes.
have fun with this siggy.
now for your border.
Image,Add border
and pick a color you want size 4
do this 3more time BUT this time 3
and then one more time at 4 pick the color that you started out with.
and place the wrap like i did on mine.
and place the wrap like i did on mine.
now put your name on it or make some cute lil saying on it.
Have fun and Ill see you guys next time!!
xoxoox
Saturday, April 16, 2011
PTU tut-SweetEaster

Hey guys!
I'm using a PTU kit here called, SweetEaster
by Disyas Digitals Designs and you can get to her blog
And you can get the kit here at
Mask WSL220 here
Tube by Barbara Jensen HERE
YOU WILL NEED A CLOSE UP AS WELL.
Open Canvas 700x650
Paper4 and Mask WSL 220 copy 3times(merge them) close off now
frame SE FR9 resize (I got the full sized kit by mistake so I cant tell you the sizes here.resize
as YOU need to I dont use the FS kits alot. I think peeps mainly use them for printing
and I dont print..) Copy the frame.Postion them similar to mine.
Border 1 resize as need,copy and mirror,
arrange similar to mine.
Get you tube out and place it however infront of the two frames.
Border 5 ,resized ,place in front of your tube.
Now standing on the tube select all,float,modify and feather inside and out.make sure
both is selected. 10
now invert and hit your delete key as many times as needed.
I hit mine 3 times.
It should look like mine now.
Bow SE_B2 resize it and place it.
Ribbon SE_R12 resize and place it.
copy reszie again and place it just above the 1st one.
click insde frames with magic wand and then expand by 6
pick a color to flood fill the inside.
Paste the close up of your tube and then do the other side
the same color or different.
now element 10 ,resize and postion it to wherever
copy and mirror
Nature 1 element..resize it and copy and paste in in front of broder
5 to make it look like she is laying in a bed of flowers.
Now once you have everything arranged the way you want
open up your masked paper and copy it and arrange them
Now I had to copy cause I had a full sized one. You may not have to.
I just didnt want to see any of the white towards the bottom and thats why I copied twice and arranged
them that way. Sorry if I confused you at this point. lol.
credits and name and you are done!
I hope you guys have fun with it.
This kit has so many things you can do with it!
Come back to my page. Im sure you will see other stuff I have made using it!!
Thank you Disyas for letting me play with your kit!
XOXOXO
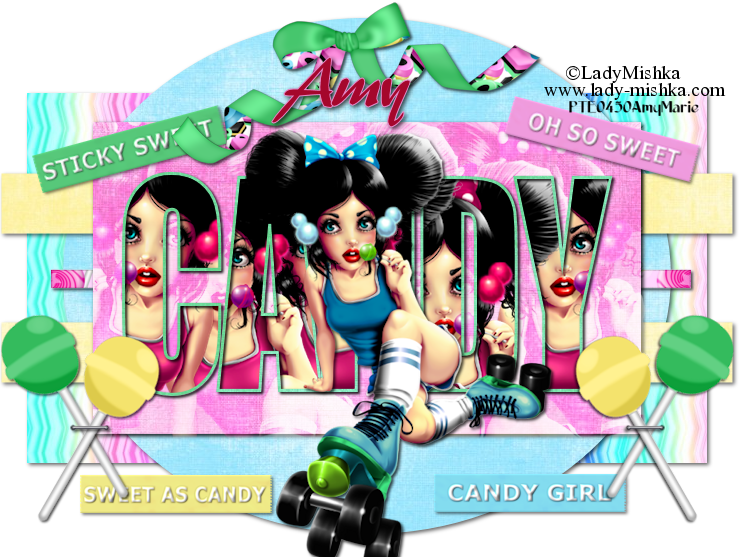
PTU Tut -Candy Girl
Hi guys!
Tube I used was by Lady Mishka, I got mine from PTE,she has now moved to SATC
Today I have used PTU scrap kit by Tammy's Scraps.
You can find her HERE
and you can pick up kit HERE .
Thank you Tammy for letting me play with your kit!
You will need Template by Christy (Love series) from Creative Misfits HERE
Delete the word art and the hearts names and credits.
Stand on the large rectangle,selections,float,invert and drap paper 8 into selection.DELETE
Stand on small rectangle,selection,float,invert and drap in paper 17.
Rectangle strips,selections,float,invert & drag in paper 19
and same for large eclips except drag in paper 16.
Now use the font called IMPACT and type in the word CANDY.
Close off your background.that way when you type CANDY its just an outline you will get.
then adjust the size,like so to mine.
Now standing on candy,select all,float,invert and drag in paper of choice.delete
now you should have just the outline of the word candy.
close this off for now.
Tube of choice ,copy and paste onto canvas.
fitting the size of the small rectangle.
using mine I have to arrange it like so 5x's and merged all 5 together to have one line.
Standing on the small rectangle, select all,float,invert
standing on mereged tube ,hit delete.
blend mode,soft light.copy blend mode,screen,opacity 60%
copy tubes again(blend mode,normal) close them off for now.
open back up the word CANDY.Standing on it. grab your magic wand and click inside.
expand by 2,open up your closed of NORMAL tubes,invert and delete.
now it should look like mine.
give the word CANDY a shadow.define it ,so it stands out.
Elements I used where
25 resized to 40% rotate 30%
element 27 40% resized, rotate other way 30%
element 114 resized 70%
element 69,68,67,...resized all at 30%
element 84
You dont have to use the same elements I did. Just have fun with the candy. That
is what makes this kit different. All that candy to play with.
I hope you have fun.
See ya next time!!
xoxoxo
BELOW is another tag I made using same kit!

Subscribe to:
Posts
(Atom)
Subscribe To


Now at PFD
CU


